The API Server communicates with all the components within the cluster.
Key-Value Store (etcd)
A light-weight distributed key-value store used to accumulate all cluster data.
Controller
Uses the API Server to monitor the state of the cluster. It tries to move the actual state of the cluster to match the desired state from your manifest file.
Scheduler
Schedules newly created pods onto worker nodes. Always selects nodes with the least traffic to balance the workload.
Worker Node
Worker nodes are the machines where the containerized workloads and storage volumes are deployed.
There are multiple instances of Worker Nodes, each performing their assigned tasks.
Kubelet
A daemon that runs on each node and responds to the master’s requests to create, destroy, and monitor pods on that machine.
Container Runtime
A container runtime retrieves images from a container image registry and starts and stops containers. This is usually a 3rd party software or plugin, such as Docker.
Kube-proxy
A network proxy that maintains network communication to your Pods from within or from outside the cluster.
Add-ons (DNS, Web UI..)
Additional features you can add to your cluster to extend certain functionalities.
Pod
A pod is the smallest element of scheduling in Kubernetes. It represents a ‘wrapper’ for the container with the application code. If you need to scale your app within a Kubernetes cluster, you can only do so by adding or removing pods. A node can host multiple pods.
Changes a disk group (adds disks, drops disks, resizes disks, or rebalances a disk group) based on an XML configuration file.
Syntax and Description chdg { config_file.xml | 'contents_of_xml_file' }
Table 12-28 lists the syntax options for the chdg command.
Table 12-28 Options for the chdg command
Option
Description
config_file
Name of the XML file that contains the changes for the disk group. chdg searches for the XML file in the directory where ASMCMD was started unless a path is specified.For examples of the valid tags and XML configuration file, see Example 12-30 and Example 12-31.
contents_of_xml_file
The XML script enclosed in single quotations.
chdg modifies a disk group based on an XML configuration file. The modification includes adding or deleting disks from an existing disk group, and the setting rebalance power level. The power level can be set to the same values as the ASM_POWER_LIMIT initialization parameter. For information about the initialization parameter, see “ASM_POWER_LIMIT”.
When adding disks to a disk group, the diskstring must be specified in a format similar to the ASM_DISKSTRING initialization parameter. For information about the initialization parameter, see “ASM_DISKSTRING”.
The failure groups are optional parameters. The default causes every disk to belong to a its own failure group. For information about failure groups, see“Oracle ASM Failure Groups”.
Dropping disks from a disk group can be performed through this operation. An individual disk can be referenced by its Oracle ASM disk name. A set of disks that belong to a failure group can be specified by the failure group name. For information about dropping disks, see“Dropping Disks from Disk Groups”.
You can resize a disk inside a disk group with chdg. The resize operation fails if there is not enough space for storing data after the resize. For information about resizing disks, see“Resizing Disks in Disk Groups”.
Example 12-30 shows the basic structure and the valid tags with their respective attributes for the chdg XML configuration file.
Example 12-30 Tags for the chdg XML configuration template
<chdg> update disk clause (add/delete disks/failure groups)
name disk group to change
power power to perform rebalance
<add> items to add are placed here
</add>
<drop> items to drop are placed here
</drop>
<fg> failure group
name failure group name
</fg>
<dsk> disk
name disk name
string disk path
size size of the disk to add
force true specifies to use the force option
</dsk>
</chdg>
For information about creating a disk group with ASMCMD mkdg, see “mkdg”. For information about altering disk groups, see “Altering Disk Groups”.
Example
The following is an example of an XML configuration file for chdg. This XML file alters the disk group named data. The failure group fg1 is dropped and the disk data_0001 is also dropped. The /dev/disk5 disk is added to failure group fg2. The rebalance power level is set to 3.
Table 12-29 lists the syntax options for the chkdg command.
Table 12-29 Options for the chkdg command
Option
Description
--repair
Repairs the disk group.
diskgroup
Name of disk group to check or repair.
chkdg checks the metadata of a disk group for errors and optionally repairs the errors.
Example
The following is an example of the chkdg command used to check and repair the data disk group.
Example 12-33 Using the ASMCMD chkdg command
ASMCMD [+] > chkdg --repair data
dropdg
Purpose
Drops a disk group.
Syntax and Description dropdg [-r-f] [-r] diskgroup
Table 12-30 lists the syntax options for the dropdg command.
Table 12-30 Options for the dropdg command
Option
Description
-f
Force the operation. Only applicable if the disk group cannot be mounted.
-r
Recursive, include contents.
diskgroup
Name of disk group to drop.
dropdg drops an existing disk group. The disk group should not be mounted on multiple nodes.
Example
These are examples of the use of dropdg. The first example forces the drop of the disk group data, including any data in the disk group. The second example drops the disk group fra, including any data in the disk group.
Example 12-34 Using the ASMCMD dropdg command
ASMCMD [+] > dropdg -r -f data
ASMCMD [+] > dropdg -r fra
iostat
Purpose
Displays I/O statistics for Oracle ASM disks in mounted disk groups.
Syntax and Description iostat [--suppressheader] [-et] [--io] [--region] [-Gdiskgroup] [interval]
iostat lists disk group statistics using the V$ASM_DISK_IOSTAT view.
Table 12-31 lists the syntax options for the iostat command.
Table 12-31 Options for the iostat command
Option
Description
-e
Displays error statistics (Read_Err, Write_Err).
-Gdiskgroup
Displays statistics for the disk group name.
--suppressheader
Suppresses column headings.
--io
Displays information in number of I/Os, instead of bytes.
-t
Displays time statistics (Read_Time, Write_Time).
--region
Displays information for cold and hot disk regions (Cold_Reads, Cold_Writes, Hot_Reads, Hot_Writes).
interval
Refreshes the statistics display based on the interval value (seconds). Use Ctrl-C to stop the interval display.
Table 12-32 shows the statistics for a disk group. To view the complete set of statistics for a disk group, use the V$ASM_DISK_IOSTAT view.
Table 12-32 Attribute descriptions for iostat command output
Attribute Name
Description
Group_Name
Name of the disk group.
Dsk_Name
Name of the disk.
Reads
Number of bytes read from the disk. If the --io option is entered, then the value is displayed as number of I/Os.
Writes
Number of bytes written to the disk. If the --io option is entered, then the value is displayed as number of I/Os.
Cold_Reads
Number of bytes read from the cold disk region. If the --io option is entered, then the value is displayed as number of I/Os.
Cold_Writes
Number of bytes written from the cold disk region. If the --io option is entered, then the value is displayed as number of I/Os.
Hot_Reads
Number of bytes read from the hot disk region. If the --io option is entered, then the value is displayed as number of I/Os.
Hot_Writes
Number of bytes written to the hot disk region. If the --io option is entered, then the value is displayed as number of I/Os.
Read_Err
Number of failed I/O read requests for the disk.
Write_Err
Number of failed I/O write requests for the disk.
Read_Time
I/O time (in hundredths of a second) for read requests for the disk if the TIMED_STATISTICS initialization parameter is set to TRUE (0 if set to FALSE).
Write_Time
I/O time (in hundredths of a second) for write requests for the disk if the TIMED_STATISTICS initialization parameter is set to TRUE (0 if set to FALSE).
If a refresh interval is not specified, the number displayed represents the total number of bytes or I/Os. If a refresh interval is specified, then the value displayed (bytes or I/Os) is the difference between the previous and current values, not the total value.
Example
The following are examples of the iostat command. The first example displays disk I/O statistics for the data disk group in total number of bytes. The second example displays disk I/O statistics for the data disk group in total number of I/O operations.
Example 12-35 Using the ASMCMD iostat command
ASMCMD [+] > iostat -G data
Group_Name Dsk_Name Reads Writes
DATA DATA_0000 180488192 473707520
DATA DATA_0001 1089585152 469538816
DATA DATA_0002 191648256 489570304
DATA DATA_0003 175724032 424845824
DATA DATA_0004 183421952 781429248
DATA DATA_0005 1102540800 855269888
DATA DATA_0006 171290624 447662592
DATA DATA_0007 172281856 361337344
DATA DATA_0008 173225472 390840320
DATA DATA_0009 288497152 838680576
DATA DATA_0010 196657152 375764480
DATA DATA_0011 436420096 356003840
ASMCMD [+] > iostat --io -G data
Group_Name Dsk_Name Reads Writes
DATA DATA_0000 2801 34918
DATA DATA_0001 58301 35700
DATA DATA_0002 3320 36345
DATA DATA_0003 2816 10629
DATA DATA_0004 2883 34850
DATA DATA_0005 59306 38097
DATA DATA_0006 2151 10129
DATA DATA_0007 2686 10376
DATA DATA_0008 2105 8955
DATA DATA_0009 9121 36713
DATA DATA_0010 3557 8596
DATA DATA_0011 17458 9269
lsattr
Purpose
Lists the attributes of a disk group.
Syntax and Description lsattr [--suppressheader][-Gdiskgroup ] [-lm] [pattern]
Table 12-33 lists the syntax options for the lsattr command.
Table 12-33 Options for the lsattr command
Option
Description
-Gdiskgroup
Disk group name.
--suppressheader
Suppresses column headings.
-l
Display names with values.
-m
Displays additional information, such as the RO and Sys columns.
pattern
Display the attributes that contain pattern expression.
Information about disk group attributes is retrieved from the V$ASM_ATTRIBUTE view. For information about disk group attributes, see “Disk Group Attributes”.
The RO (read-only) column identifies those attributes that can only be set when a disk group is created. The Sys column identifies those attributes that are system-created.
To display information about the disk group template attributes, see “lstmpl”.
The following are examples of the lsattr command. The first displays information about all attributes for the data disk group. The second example displays only those attributes with names containing the string compat for the fra disk group. Note the use of both the % and * wildcard characters on Linux.
Example 12-36 Using the ASMCMD lsattr command
ASMCMD [+] > lsattr -G data -l
Name Value
access_control.enabled FALSE
access_control.umask 066
au_size 1048576
cell.smart_scan_capable FALSE
compatible.advm 11.2.0.0.0
compatible.asm 11.2.0.0.0
compatible.rdbms 11.2.0.0.0
disk_repair_time 3.6h
sector_size 512
ASMCMD [+] > lsattr -G fra -l %compat*
Name Value
compatible.asm 11.2.0.0.0
compatible.rdbms 10.1.0.0.0
lsdg
Purpose
Lists mounted disk groups and their information. lsdg queries V$ASM_DISKGROUP_STAT by default. If the --discovery flag is specified, the V$ASM_DISKGROUP is queried instead. The output also includes notification of any current rebalance operation for a disk group. If a disk group is specified, then lsdg returns only information about that disk group.
Table 12-34 lists the options for the lsdg command.
Table 12-34 Options for the lsdg command
Option
Description
(none)
Displays the disk group attributes listed in Table 12-35.
--discovery
Selects from V$ASM_DISKGROUP, or from GV$ASM_DISKGROUP if the -g flag is also specified. This option is always enabled if the Oracle ASM instance is version 10.1 or earlier. This flag is disregarded if lsdg is running in non-connected mode.
-g
Selects from GV$ASM_DISKGROUP_STAT, or from GV$ASM_DISKGROUP if the --discovery flag is also specified. GV$ASM_DISKGROUP.INST_ID is included in the output. The REBAL column of the GV$ASM_OPERATION view is also included in the output.
--suppressheader
Suppresses column headings.
pattern
Returns only information about the specified disk group or disk groups that match the supplied pattern. See “Wildcard Characters”.
Table 12-35 shows the attributes for each disk group. To view the complete set of attributes for a disk group, use the V$ASM_DISKGROUP_STAT or V$ASM_DISKGROUP view.
See Also:Oracle Database Reference for descriptions of disk group information displayed in the V$ASM_DISKGROUP view
Table 12-35 Attribute descriptions for lsdg command output
Attribute Name
Description
State
State of the disk group. Values include BROKEN, CONNECTED, DISMOUNTED, MOUNTED, QUIESCING, and UNKNOWN.
Type
Disk group redundancy (NORMAL, HIGH, EXTERNAL).
Rebal
Y if a rebalance operation is in progress.
Sector
Sector size in bytes.
Block
Block size in bytes.
AU
Allocation unit size in bytes.
Total_MB
Size of the disk group in megabytes.
Free_MB
Free space in the disk group in megabytes, without regard to redundancy. From the V$ASM_DISKGROUP view.
Req_mir_free_MB
Amount of space that must be available in the disk group to restore full redundancy after the most severe failure that can be tolerated by the disk group. This is the REQUIRED_MIRROR_FREE_MB column from the V$ASM_DISKGROUP view.
Usable_file_MB
Amount of free space, adjusted for mirroring, that is available for new files. From the V$ASM_DISKGROUP view.
Offline_disks
Number of offline disks in the disk group. Offline disks are eventually dropped.
Voting_files
Specifies whether the disk group contains voting files (Y or N).
Name
Disk group name.
Example
The following example lists the attributes of the data disk group.
Example 12-37 Using the ASMCMD lsdg command
ASMCMD [+] > lsdg data
State Type Rebal Sector Block AU Total_MB Free_MB Req_mir_free_MB Usable_file_MB
MOUNTED NORMAL N 512 4096 4194304 12288 8835 1117 3859
(continued)
Offline_disks Voting_files Name
0 N DATA
Table 12-36 lists the options for the lsdsk command.
Table 12-36 Options for the lsdsk command
Option
Description
(none)
Displays the PATH column of the V$ASM_DISK_STAT view.
-k
Displays the TOTAL_MB, FREE_MB, OS_MB,NAME, FAILGROUP, LIBRARY, LABEL, UDID, PRODUCT, REDUNDANCY, and PATH columns of the V$ASM_DISK view.
--statistics
Displays the READS, WRITES, READ_ERRS, WRITE_ERRS, READ_TIME, WRITE_TIME, BYTES_READ, BYTES_WRITTEN, and the PATH columns of the V$ASM_DISK view.
-p
Displays the GROUP_NUMBER, DISK_NUMBER, INCARNATION, MOUNT_STATUS, HEADER_STATUS, MODE_STATUS, STATE, and the PATH columns of the V$ASM_DISK view.
-t
Displays the CREATE_DATE, MOUNT_DATE, REPAIR_TIMER, and the PATH columns of the V$ASM_DISK view.
-g
Selects from GV$ASM_DISK_STAT, or from GV$ASM_DISK if the --discovery flag is also specified. GV$ASM_DISK.INST_ID is included in the output.
--discovery
Selects from V$ASM_DISK, or from GV$ASM_DISK if the -g flag is also specified. This option is always enabled if the Oracle ASM instance is version 10.1 or earlier. This flag is disregarded if lsdsk is running in non-connected mode.
--suppressheader
Suppresses column headings.
-I
Scans disk headers for information rather than extracting the information from an Oracle ASM instance. This option forces non-connected mode.
-G
Restricts results to only those disks that belong to the group specified by diskgroup.
-M
Displays the disks that are visible to some but not all active instances. These are disks that, if included in a disk group, cause the mount of that disk group to fail on the instances where the disks are not visible.
--candidate
Restricts results to only disks having membership status equal to CANDIDATE.
--member
Restricts results to only disks having membership status equal to MEMBER.
pattern
Returns only information about the specified disks that match the supplied pattern.
The lsdsk command can run in connected or non-connected mode. The connected mode is always attempted first. The -I option forces non-connected mode.
In connected mode, lsdsk uses the V$ASM_DISK_STAT and V$ASM_DISK dynamic views to retrieve disk information. The V$ASM_DISK_STAT view is used by default.
In non-connected mode, lsdsk scans disk headers to retrieve disk information. Some information is not available in this mode and some options are not valid combinations with this mode.
Note:The non-connected mode is not supported on Windows.
pattern restricts the output to only disks that match the pattern specified. Wild-card characters and slashes (/ or \) can be part of the pattern. pattern should be specified as the last option for the command. For information about wildcards, see “Wildcard Characters”.
The -k, -p, -t, and --statistics options modify how much information is displayed for each disk. If any combination of the options are specified, then the output shows the union of the attributes associated with each flag.
Example
The following are examples of the lsdsk command. The first and second examples list information about disks in the data disk group. The third example lists information about candidate disks.
Example 12-38 Using the ASMCMD lsdsk command
ASMCMD [+] > lsdsk -t -G data
Create_Date Mount_Date Repair_Timer Path
13-JUL-09 13-JUL-09 0 /devices/diska1
13-JUL-09 13-JUL-09 0 /devices/diska2
13-JUL-09 13-JUL-09 0 /devices/diska3
13-JUL-09 13-JUL-09 0 /devices/diskb1
13-JUL-09 13-JUL-09 0 /devices/diskb2
13-JUL-09 13-JUL-09 0 /devices/diskb3
13-JUL-09 13-JUL-09 0 /devices/diskc1
13-JUL-09 13-JUL-09 0 /devices/diskc2
...
ASMCMD [+] > lsdsk -p -G data /devices/diska*
Group_Num Disk_Num Incarn Mount_Stat Header_Stat Mode_Stat State Path
1 0 2105454210 CACHED MEMBER ONLINE NORMAL /devices/diska1
1 1 2105454199 CACHED MEMBER ONLINE NORMAL /devices/diska2
1 2 2105454205 CACHED MEMBER ONLINE NORMAL /devices/diska3
ASMCMD [+] > lsdsk --candidate -p
Group_Num Disk_Num Incarn Mount_Stat Header_Stat Mode_Stat State Path
0 5 2105454171 CLOSED CANDIDATE ONLINE NORMAL /devices/diske1
0 25 2105454191 CLOSED CANDIDATE ONLINE NORMAL /devices/diske2
0 18 2105454184 CLOSED CANDIDATE ONLINE NORMAL /devices/diske3
0 31 2105454197 CLOSED CANDIDATE ONLINE NORMAL /devices/diskk1
0 21 2105454187 CLOSED CANDIDATE ONLINE NORMAL /devices/diskk2
0 26 2105454192 CLOSED CANDIDATE ONLINE NORMAL /devices/diskk3
0 14 2105454180 CLOSED CANDIDATE ONLINE NORMAL /devices/diskl1
...
lsod
Purpose
Lists the open Oracle ASM disks.
Syntax and Description lsod [--suppressheader] [-Gdiskgroup] [--processprocess] [pattern]
Table 12-37 lists the syntax options for the lsod command.
Table 12-37 Options for the lsod command
Option
Description
--suppressheader
Suppresses column header information from the output.
-Gdiskgroup
Specifies the disk group that contains the open disks.
--processprocess
Specifies a pattern to filter the list of processes.
pattern
Specifies a pattern to filter the list of disks.
The rebalance operation (RBAL) opens a disk both globally and locally so the same disk may be listed twice in the output for the RBAL process.
Example
The following are examples of the lsod command. The first example lists the open devices associated with the data disk group and the LGWR process. The second example lists the open devices associated with the LGWR process for disks that match the diska pattern.
For another example of the lsod command, see Example 12-2.
md_backup
Purpose
The md_backup command creates a backup file containing metadata for one or more disk groups.
Syntax and Description md_backupbackup_file [-G'diskgroup [,diskgroup,...]']
Table 12-38 describes the options for the md_backup command.
Table 12-38 Options for the md_backup command
Option
Description
backup_file
Specifies the backup file in which you want to store the metadata.
-Gdiskgroup
Specifies the disk group name of the disk group that must be backed up
By default all the mounted disk groups are included in the backup file, which is saved in the current working directory if a path is not specified with the file name.
Oracle Automatic Storage Management Cluster File System (Oracle ACFS) volume and file system information is not backed up.
Example
The first example shows the use of the backup command when run without the disk group option. This example backs up all the mounted disk groups and creates the backup image in the /scratch/backup/alldgs20100422 file. The second example creates a backup of the data disk group. The metadata backup that this example creates is saved in the /scratch/backup/data20100422 file.
Example 12-40 Using the ASMCMD md_backup command
ASMCMD [+] > md_backup /scratch/backup/alldgs20100422
Disk group metadata to be backed up: DATA
Disk group metadata to be backed up: FRA
Current alias directory path: ORCL/ONLINELOG
Current alias directory path: ORCL/PARAMETERFILE
Current alias directory path: ORCL
Current alias directory path: ASM
Current alias directory path: ORCL/DATAFILE
Current alias directory path: ORCL/CONTROLFILE
Current alias directory path: ASM/ASMPARAMETERFILE
Current alias directory path: ORCL/TEMPFILE
Current alias directory path: ORCL/ARCHIVELOG/2010_04_20
Current alias directory path: ORCL
Current alias directory path: ORCL/BACKUPSET/2010_04_21
Current alias directory path: ORCL/ARCHIVELOG/2010_04_19
Current alias directory path: ORCL/BACKUPSET/2010_04_22
Current alias directory path: ORCL/ONLINELOG
Current alias directory path: ORCL/BACKUPSET/2010_04_20
Current alias directory path: ORCL/ARCHIVELOG
Current alias directory path: ORCL/BACKUPSET
Current alias directory path: ORCL/ARCHIVELOG/2010_04_22
Current alias directory path: ORCL/DATAFILE
Current alias directory path: ORCL/CONTROLFILE
Current alias directory path: ORCL/ARCHIVELOG/2010_04_21
ASMCMD [+] > md_backup /scratch/backup/data20100422 -G data
Disk group metadata to be backed up: DATA
Current alias directory path: ORCL/ONLINELOG
Current alias directory path: ASM
Current alias directory path: ORCL/CONTROLFILE
Current alias directory path: ASM/ASMPARAMETERFILE
Current alias directory path: ORCL/PARAMETERFILE
Current alias directory path: ORCL
Current alias directory path: ORCL/DATAFILE
Current alias directory path: ORCL/TEMPFILE
md_restore
Purpose
The md_restore command restores disk groups from a metadata backup file.
Syntax and Description md_restorebackup_file[--silent] [--full|--nodg|--newdg-o'old_diskgroup:new_diskgroup [,…]’] [-Ssql_script_file] [-G'diskgroup [,diskgroup…]']
Table 12-39 describes the options for the md_restore command.
Table 12-39 Options for the md_restore command
Option
Description
backup_file
Reads the metadata information from backup_file.
--silent
Ignore errors. Typically, if md_restore encounters an error, it stops. Specifying this flag ignores any errors.
--full
Specifies to create a disk group and restore metadata.
--nodg
Specifies to restore metadata only.
--newdg-oold_diskgroup:new_diskgroup]
Specifies to create a disk group with a different name when restoring metadata. The -o option is required with --newdg.
-Ssql_script_file
Write SQL commands to the specified SQL script file instead of executing the commands.
-Gdiskgroup
Select the disk groups to be restored. If no disk groups are defined, then all disk groups are restored.
Example
The first example restores the disk group data from the backup script and creates a copy. The second example takes an existing disk group data and restores its metadata. The third example restores disk group data completely but the new disk group that is created is named data2. The fourth example restores from the backup file after applying the overrides defined in the override.sql script file.
Creates a disk group based on an XML configuration file.
Syntax and Description mkdg { config_file.xml | 'contents_of_xml_file' }
Table 12-40 lists the syntax options for the mkdg command.
Table 12-40 Options for the mkdg command
Option
Description
config_file
Name of the XML file that contains the configuration for the new disk group. mkdg searches for the XML file in the directory where ASMCMD was started unless a path is specified.For examples of the valid tags and XML configuration file, see Example 12-42 and Example 12-43.
contents_of_xml_file
The XML script enclosed in single quotations.
mkdg creates a new disk group with an XML configuration file that specifies the name of the disk group, redundancy, attributes, and paths of the disks that form the disk group. Redundancy is an optional parameter; the default is normal redundancy. For some types of redundancy, disks are required to be gathered into failure groups. In the case that failure groups are not specified for a disk group, each disk in the disk group belongs to its own failure group.
Note that mkdg only mounts a disk group on the local node.
It is possible to set some disk group attribute values during disk group creation. Some attributes, such as AU_SIZE and SECTOR_SIZE, can be set only during disk group creation. For more information about disk groups attributes, refer to “Disk Group Attributes”.
The default disk group compatibility settings are 10.1 for Oracle ASM compatibility, 10.1 for database compatibility, and no value for Oracle ADVM compatibility. For information about disk group compatibility attributes, see “Disk Group Compatibility”.
Example 12-42 shows the basic structure and the valid tags with their respective attributes for the mkdg XML configuration file.
Example 12-42 Tags for mkdg XML configuration file
<dg> disk group
name disk group name
redundancy normal, external, high
<fg> failure group
name failure group name
</fg>
<dsk> disk
name disk name
string disk path
size size of the disk to add
force true specifies to use the force option
</dsk>
<a> attribute
name attribute name
value attribute value
</a>
</dg>
For information about altering a disk group with ASMCMD chdg, see “chdg”. For information about creating a disk group, see “Creating Disk Groups”.
Example
The following is an example of an XML configuration file for mkdg. The configuration file creates a disk group named data with normal redundancy. Two failure groups, fg1 and fg2, are created, each with two disks identified by associated disk strings. The disk group compatibility attributes are all set to 11.2.
The following are examples of the mkdg command. The first example runs mkdg with an XML configuration file in the directory where ASMCMD was started. The second example runs mkdg using information on the command line.
Syntax and Description mount [--restrict] { [-a] | [-f] diskgroup[ diskgroup …] }
Table 12-41 lists the syntax options for the mount command.
Table 12-41 Options for the mount command
Option
Description
diskgroup
Name of the disk group.
-a
Mounts all disk groups.
--restrict
Mounts in restricted mode.
-f
Forces the mount operation.
This operation mounts one or more disk groups. A disk group can be mounted with or without force or restricted options. For more information about mounting disk groups, see “Mounting and Dismounting Disk Groups”.
Example
The following are examples of the mount command showing the use of the force, restrict, and all options.
Example 12-45 Using the ASMCMD mount command
ASMCMD [+] > mount -f data
ASMCMD [+] > mount --restrict data
ASMCMD [+] > mount -a
offline
Purpose
Offline disks or failure groups that belong to a disk group.
Table 12-42 lists the syntax options for the offline command.
Table 12-42 Options for the offline command
Option
Description
-Gdiskgroup
Disk group name.
-Ffailgroup
Failure group name.
-Ddisk
Specifies a single disk name.
-tminutes | hours
Specifies the time before the specified disk is dropped as nm or nh, where m specifies minutes and h specifies hours. For example, 120m or 2h.The default unit is hours.
When a failure group is specified, this implies all the disks that belong to it should be offlined.
Example
The following are examples of the offline command. The first example offlines the failgroup1 failure group of the data disk group. The second example offlines the data_0001 disk of the data disk group with a time of 1.5 hours before the disk is dropped.
Example 12-46 Using the ASMCMD offline command
ASMCMD [+] > offline -G data -F failgroup1
ASMCMD [+] > offline -G data -D data_0001 -t 1.5h
online
Purpose
Online all disks, a single disk, or a failure group that belongs to a disk group.
Syntax and Description online-Gdiskgroup { -a | -Ffailgroup |-Ddisk} [-w]
Table 12-43 lists the syntax options for the online command.
Table 12-43 Options for the online command
Option
Description
-a
Online all offline disks in the disk group.
-Gdiskgroup
Disk group name.
-Ffailgroup
Failure group name.
-Ddisk
Disk name.
-w
Wait option. Causes ASMCMD to wait for the disk group to be rebalanced before returning control to the user. The default is not waiting.
When a failure group is specified, this implies all the disks that belong to it should be onlined.
Example
The following are examples of the online command. The first example onlines all disks in the failgroup1 failure group of the data disk group with the wait option enabled. The second example onlines the data_0001 disk in the data disk group.
Example 12-47 Using the ASMCMD online command
ASMCMD [+] > online -G data -F failgroup1 -w
ASMCMD [+] > online -G data -D data_0001
rebal
Purpose
Rebalances a disk group.
Syntax and Description rebal [--powerpower] [-w] diskgroup
Table 12-44 lists the syntax options for the rebal command.
Table 12-44 Options for the rebal command
Option
Description
diskgroup
Disk group name.
--powerpower
Power setting.
-w
Wait option. Causes ASMCMD to wait for the disk group to be rebalanced before returning control to the user. The default is not waiting.
The power level can be set to the same values as the ASM_POWER_LIMIT initialization parameter. A value of 0 disables rebalancing. If the rebalance power is not specified, the value defaults to the setting of the ASM_POWER_LIMIT initialization parameter. For information about the power level, see “ASM_POWER_LIMIT” and “Tuning Rebalance Operations”.
You can determine if a rebalance operation is occurring with the ASMCMD lsop command. See “lsop”. For more information about rebalancing a disk group, see “Manually Rebalancing Disk Groups”.
Example
The following is an example of the rebal command that rebalances the fra disk group with a power level set to 4.
Example 12-48 Using the ASMCMD rebal command
ASMCMD [+] > rebal --power 4 fra
ASMCMD [+] > lsop
Group_Name Dsk_Num State Power
FRA REBAL RUN 4
remap
Purpose
Marks a range of blocks as unusable on the disk and relocates any data allocated in that range.
Syntax and Description
remapdiskgroupdiskblock_range
Table 12-45 lists the syntax options for the remap command.
Table 12-45 Options for the remap command
Option
Description
diskgroup
Disk group name in which a disk must have data relocated.
disk
Name of the disk that must have data relocated. The name must match the NAME column in the V$ASM_DISK view.
block_range
Range of physical blocks to relocate in the format start_range_number-end_range_number.
The remap command only relocates blocks. It does not correct or repair blocks that contain corrupted contents. The command uses a physical block size based on the SECTOR_SIZE disk group attribute.
Examples
The first example remaps blocks 5000 through 5999 for disk DATA_0001 in disk group DATA. The second example remaps blocks 6230 through 6339 for disk FRA_0002 in disk group FRA
Example 12-49 Using the ASMCMD remap command
ASMCMD [+] > remap DATA DATA_0001 5000-5999
ASMCMD [+] > remap FRA FRA_0002 6230-6339
setattr
Purpose
Sets the attributes for an Oracle ASM disk group.
Syntax and Description setattr-Gdiskgroupattribute_nameattribute_value
Table 12-46 lists the syntax options for the setattr command.
Table 12-46 Options for the setattr command
Option
Description
-Gdiskgroup
Disk group name.
attribute_name
Name of the attribute.
attribute_value
Value of the attribute.
The COMPATIBLE.ASM attribute must be advanced before advancing other disk group compatibility attributes and its value must be greater than or equal to the value of other disk group compatibility attributes.
The following are examples of the setattr command. The first example sets the disk group attribute COMPATIBLE.ASM to 11.2 for the data disk group. The second example sets the disk group attribute COMPATIBLE.RDBMS to 11.2 for the data disk group.
Example 12-50 Using the ASMCMD setattr command
ASMCMD [+] > setattr -G data compatible.asm 11.2.0.0.0
ASMCMD [+] > setattr -G data compatible.rdbms 11.2.0.0.0
umount
Purpose
Dismounts a disk group.
Syntax and Description umount { -a | [-f] diskgroup }
Table 12-47 lists the syntax options for the umount command.
Table 12-47 Options for the umount command
Option
Description
diskgroup
Name of the disk group.
-a
Dismounts all mounted disk groups. These disk groups are listed in the output of the V$ASM_DISKGROUP view.
-f
Forces the dismount operation.
Example
The following are examples of the umount command. The first example dismounts all disk groups mounted on the Oracle ASM instance. The second example forces the dismount of the data disk group.
Example 12-51 Using the ASMCMD umount command
ASMCMD [+] > umount -a
ASMCMD [+] > umount -f data
To start resources of your HA environment if that are still down(e.g. ora.ons, Listener): crsctl start resource -all
DEBUG
Starting with Oracle 12c, the log and trace files of the clusterware files are stored in the Automatic Diagnostic Repository (ADR) under the ADR_HOME location $ADR_BASE/diag/crs/`hostname`/crs.
$ adrci adrci> show homes
Cluster resources: CRS, HAS and cluster
How to display the status of resources in RAC?
Clusterware Resource Status Check : crsctl status resource -t (or shorter: crsctl stat res -t)
crsctl status resource -t (or shorter: crsctl stat res -t)
How to To start and stop oracle clusterware (CRS)?
crsctl stop crs crsctl start crs
Manage Network components
How to display global public and global cluster_interconnect?
C:\Windows\system32>oifcfg ge34f Heartbeat 194.56.67.0 global cluster_interconnect,asm Production 10.356.3.0 global public
How to check if nodeapps running on a node?
srvctl status nodeapps [-n my-node] For each VIP address: network enabled/disabled, running on node host1 or not running.
Nodeapps are standard set of oracle application services which are started automatically for RAC. Node apps Include: 1) VIP 2) Oracle Net listeners 3) Global Service Daemon 4) Oracle Notification Service (ONS).
Nodeapp Services run on each node of the cluster. They switch over to other nodes through VIP during a failover.
How to check the SCAN Configuration?
The SCAN makes it possible to add or remove nodes from the cluster without needing to reconfigure clients.
Using CLUVFY to Confirm DNS is Correctly Associating the SCAN addresses.
cluvfy comp scan Verifying Single Client Access Name (SCAN) …PASSED Verification of SCAN was successful. CVU operation performed: SCAN Date: Oct 19, 2017 1:17:59 PM CVU home: C:\…\grid_home\bin\..\ User: .\VFENOLL
Display the current configuration of the SCAN VIPs?
srvctl config scan SCAN name: MY-CLUSTER-SCAN, Network: 1 Subnet IPv4: 10.104.2.0/255.255.255.0/Production, static Subnet IPv6: SCAN 1 IPv4 VIP: 10.404.2.677 SCAN VIP is enabled. SCAN VIP is individually enabled on nodes: SCAN VIP is individually disabled on nodes: SCAN 2 IPv4 VIP: 10.404.2.618 SCAN VIP is enabled. SCAN VIP is individually enabled on nodes: SCAN VIP is individually disabled on nodes: SCAN 3 IPv4 VIP: 10.404.2.619 SCAN VIP is enabled. SCAN VIP is individually enabled on nodes: SCAN VIP is individually disabled on nodes:
Display the status of SCAN VIPs and SCAN listeners?
srvctl status scan SCAN VIP scan1 is enabled SCAN VIP scan1 is running on node my-node1 SCAN VIP scan2 is enabled SCAN VIP scan2 is running on node my-node2 SCAN VIP scan3 is enabled SCAN VIP scan3 is running on node my-node1
If you want to add or modify a scan VIP: srvctl add | modify scan -n my-scan To delete it: srvctl remove scan
Display the status of SCAN listeners?
srvctl status scan_listener SCAN Listener LISTENER_SCAN1 is enabled SCAN listener LISTENER_SCAN1 is running on node my-node1 SCAN Listener LISTENER_SCAN2 is enabled SCAN listener LISTENER_SCAN2 is running on node my-node2 SCAN Listener LISTENER_SCAN3 is enabled SCAN listener LISTENER_SCAN3 is running on node my-node1
If you want to add or remove a scan_listener: srvctl add | remove scan_listener To change the port: srvctl modify scan_listener -p
Manage the Oracle Cluster Registry (OCR)
Verify the integrity of OCR?
cluvfy comp ocr -n all -verbose Verifying OCR Integrity …PASSED Verification of OCR integrity was successful. CVU operation performed: OCR integrity Date: Oct 11, 2017 4:56:01 PM CVU home: C:\…grid_home\bin\..\ User: \VFENOLL
How to backup the OCR?
Oracle takes physical backup of OCR automatically every 3 hours. Default location is CRS_home/cdata/my_cluster_name/OCRBackup. The ocrconfig tool is used to make daily copies of the automatically generated backup files.
Show backups: ocrconfig -showbackup
Change default location of physical OCR copies: ocrconfig -backuploc
After that, you have to copy these files on tape or in another backup location (cp -p -R CRS_home/cdata/my_cluster_name /u03/backups )
To do a manual backup: ocrconfig -export /u03/backups/exports/OCR_exportBackup.dmp
How to recover OCR from physical or export backup?
Pre-requisite: All RAC components shutdow
Recover OCR from automatic physical backups: crconfig -restore CRS_home/cdata/my_cluster_name/OCRBackup/backup00.ocr
Recover OCR from export backup: ocrconfig -import /u03/backups/exports/OCR_exportBackup.dmp
How to backup the Voting disks?
In older versions of Oracle Clusterware you have to backup voting disks with the dd command. Starting with Oracle Clusterware 11g Release 2 you no longer need to backup them. Voting disks are automatically backed up as a part of the OCR.
Manage database components
How to find the name of the database?
This name is useful as it is used in RAC commands with -d parameter. With SQL*Plus: connect / as sysdba show parameter db_unique_name With crsctl: crsctl status resource -t | grep db
How to inspect the database configuration?
srvctl config database -d my-db-name Database unique name: my-db-name Database name: my-db-name Oracle home: D:\oracle\db\product\12.2.0\dbhome_1 Oracle user: nt authority\system Spfile: +DATA/my-db-name/PARAMETERFILE/spfile.272.9460543263 Password file: +DATA/my-db-name/PASSWORD/pwdmy-db-name.256.998734039 Domain: Start options: open Stop options: immediate Database role: PRIMARY Management policy: AUTOMATIC Server pools: Disk Groups: DATA,FRA Mount point paths: Services: my-db-name1,my-db-name2,srv1,srv2, srv3 Type: RAC Start concurrency: Stop concurrency: Database instances: my-db-name1,my-db-name2 Configured nodes: node1,node2 CSS critical: no CPU count: 0 Memory target: 0 Maximum memory: 0 Default network number for database services: Database is administrator managed
Display name and the status of the instances in the RAC?
srvctl status database -d my-db-name Instance my-db-name1 is running on node node1 Instance my-db-name2 is not running on node node2
srvctl start instance -d my-db-name -i my-db-name1 srvctl stop instance -d my-db-name -i my-db-name1 Use -force if the instance to stop is not on the local server
How to start and stop a PDB in Oracle RAC?
Stop a PDB
On the current node [or on all the nodes]: ALTER PLUGGABLE DATABASE my-PDB-name CLOSE IMMEDIATE [Instances=all]; This will stop the associated service too. Manually stopping the associated service will not close the PDB. You have to use this SQL command.
Start a PDB
On the current node [or on all the nodes]: ALTER PLUGGABLE DATABASE my-PDB-name OPEN [Instances=all;] You can also start the PDB with the associated service This will NOT start the service(s) associated with this PDB.
This command sets the author name
and email address respectively to be used with your commits.
Do the
following to create a new repository:
To create a new
repository, give a repository name and initialize a readme file.
After creating
a new repository called Property in
git hub, Clone the repository into your local system.
Open a browser and
a terminal window from your desktop. After opening the terminal window, do the
following:
Navigate to your home (~) directory.
$ cd ~
As you use Github more, you will probably work in multiple repositories.
For that reason, it’s a good idea to create a directory to contain all those
repositories.
Create a
directory to contain your repositories.
$ mkdir repos
From the
terminal, update the directory you want to work in to your new repos directory.
$ cd ~/repos
From Github, go to your Property repository
and select Clone this repository.
Github displays
a pop-up clone dialog. By default, the clone dialog sets the protocol to HTTPS or SSH,
depending on your settings.
Copy the
highlighted clone command.
From your
terminal window, paste the command you copied from Github and press Return.
In the git
terminal, give the git clone command.
Git
clone [url]
List the
contents of your repos directory and you should see your Property directory in it.
So, we
successfully cloned your repository to your local repository.
Add a file to your local repository and
put it on Github:
Go to your terminal window and navigate to the top level
of your local repository.
Enter
the following line into your terminal window to create a new file with content.
List all the file in Property
directory by using command ls
Get the status of
your local repository. The git status command tells you about how your project is progressing in comparison
to your Github repository.
At this point, Git
is aware that you created a new file, and you’ll see something like this:
The file is untracked, meaning
that Git sees a file not part of a previous commit. The status output also
shows you the next step: adding the file.
Tell Git to track your new locations.txt file using the git add command.
Just like when you created a file, the git add command doesn’t return
anything when you enter it correctly.
The git add command moves changes from the
working directory to the Git staging area. The staging area is where you
prepare a snapshot of a set of changes before committing them to the official
history.
Issue the git commit command with a commit message, as
shown on the next line. The -m indicates that a commit message follows.
The git commit takes the staged snapshot and commits
it to the project history. Combined with git add,
this process defines the basic workflow for all Git users.
Up until this point, everything you have done is on your
local system and invisible to your Github repository until you push those
changes.
Go back to your local terminal window and send your
committed changes to Github using
git push origin Master. This command specifies
that you are pushing to the master branch (the branch on Github) on origin (the
Github server).
Your commits are now on the remote repository (origin).
Go to your Property
repository on Github. If you click Commits in the sidebar,
you’ll see a single commit on your repository. Github combines all
the things you just did into that commit and shows it to you.
Pull changes from your Git repository on Github
Step 1. Create a file in Github
To add your new locations
file, do the following:
From your Property repository,
click Source to open the source directory. Notice you only
have two files, locations.txt and README in your directory.
Create a new file called Estate Agent and
commit changes by commit Button.
So new file is formed in Property
Repository. You need to pull that file to the local repository by doing
following:
1.Open your terminal window and navigate
to the top level repository.
2.Enter the git pull –all command to pull all the changes from
github
The git pull command merges the file from your remote repository (Bitbucket)
into your local repository with a single command.
Navigate to your repository folder on your
local system and you’ll see the file you just added.
Fantastic, pull
command pulled the estate agent file to the local repository.
set linesize 200 select blocking_session, sid, serial#, wait_class, seconds_in_wait from gv$session where blocking_session is not null order by blocking_session ; blocking_sessionsid serial# wait_classseconds_in_wait ---------------- ---------- ---------- -------------------- -------- 148 135 61521 idle 64
Note: We found that session 148 is blocking session 135 and has been for 64 seconds.
2. Run the script provided by oracle.
@?/rdbms/admin/utllockt.sql
3. Simple query to find the blocking session information.
select object_id,session_id,process,locked_mode from gv$locked_object where session_id in (&session_id);
a. This will give easy readable output for locking objects.
set lines 100 set pages 500 col "lock particulars" format a100 select (select username from gv$session where sid=a.sid) || '('||a.sid||')'|| ' is blocking to '|| (select username from gv$session where sid=b.sid) || '('||b.sid||')' "lock particulars" from gv$lock a, gv$lock b where a.block = 1 and b.request> 0 and a.id1 = b.id1 and a.id2 = b.id2 ; lock particulars ---------------------------------------------------------------------------------------------------- qsitbba(9) is blocking to vitvcd(7) qsitbba(72) is blocking to vitvcd(7) qsitbba(9) is blocking to qtnsdp(72)
4. Use below to find kill details.
Note: need to provide the sid from above query.
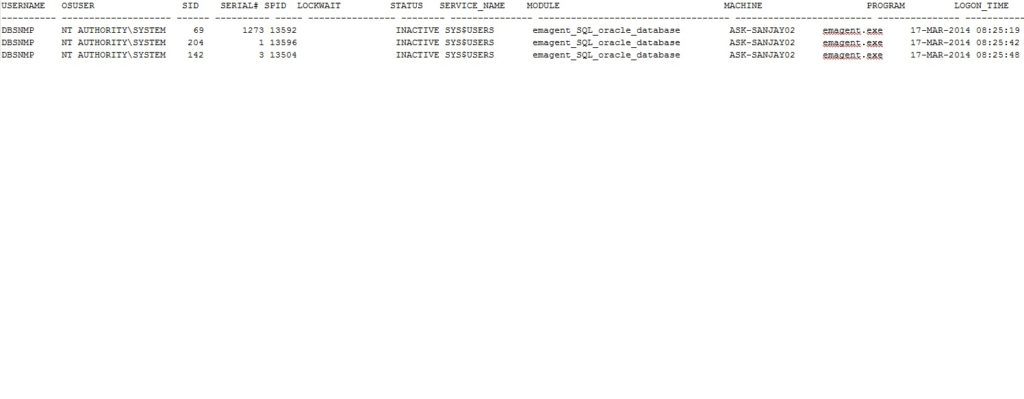
setlinesize 200 col username format a15 colschemaname format a15 col program format a15 select sid,serial#,username,status,schemaname,program,to_char(logon_time,'dd/mm/yyyy hh24:ss:mm') logon_time from v$session where sid in(&sid);
5. >kill -3/9 can be run on spid provided by below query.
set linesize 100 column spid format a10 column username format a10 column program format a45 selects.inst_id, s.sid, s.serial#, p.spid, s.username, s.program from gv$session s join gv$process p on p.addr = s.paddr and p.inst_id = s.inst_id where s.sid=1950 ;
6. >To see queries running from more than 5 sec.
Note: new feature of 11g.
set linesize 200 select s.sid, serial#, s.sql_id, (sysdate-sql_exec_start)*24*60*60 secs, sql_text from v$session s, v$sqltext t wheres.sql_id = t.sql_id and sql_exec_start is not null and piece = 0 and (sysdate-sql_exec_start)*24*60*60 > 5 ;
7. To find the details of locking objects.
set lines 180 set pages 500 col owner format a15 col object_name format a20 col object_type format a20 col sid a8 col serial# format a50 col status format a 10 col osuser format a10 col machine format a60
select c.owner, c.object_name, c.object_type, b.sid, b.serial#, b.status, b.osuser, b.machine from v$locked_object a , v$session b, dba_objects c where b.sid = a.session_id and a.object_id = c.object_id ;
8. To find the sql being run by blocking sid
select s.sid, s.serial#, t.sql_fulltext,t.sql_id,s.sql_hash_value,t.hash_value from v$session s, v$sql t where s.sql_address = t.address and s.sql_hash_value = t.hash_value and s.sid=1950 ;
9. To find out the query information against the process which you take from unix.
select sql_text, optimizer_mode, module, action from v$sqlarea where hash_value in ( select sql_hash_value from v$session wherepaddr=( select addr from v$process where spid=&process_id ) );
10. To see the queries running from more than 5 sec
set linesize 200 select s.sid, serial#, s.sql_id, (sysdate-sql_exec_start)*24*60*60 secs, sql_text from v$session s, v$sqltext t where s.sql_id = t.sql_id and sql_exec_start is not null and piece = 0 and (sysdate-sql_exec_start)*24*60*60 > 5 ; sid serial# sql_idsecssql_text ---------- ---------- ------------- ---------- ---------------------------------------------------------------- 492 46694 a0f74y2n959cbt 12 select /*+ first_rows(1) use_nl (p t) */ path_name,path_doci