
Email configuration is an important service for a website. But it will be easy if you are hosting your website on AWS and following below steps to set up your email address.
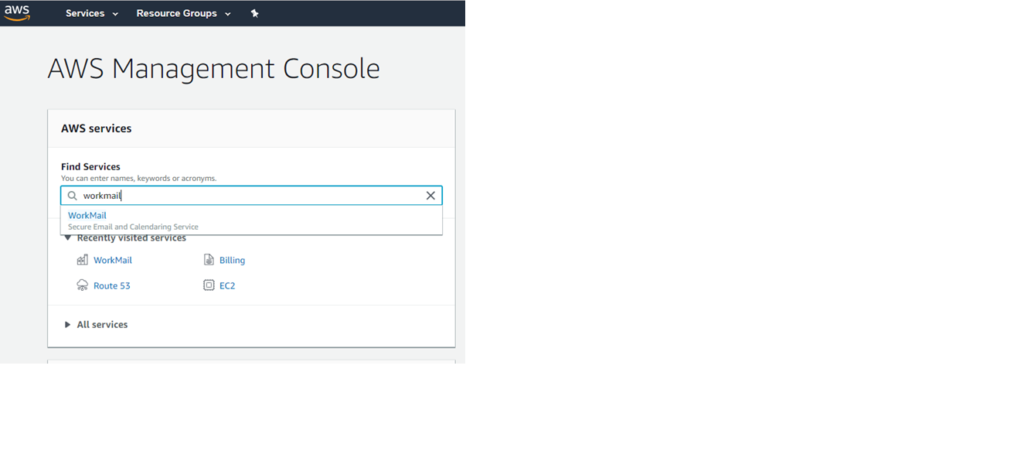
- Go to “Workmail” Service.
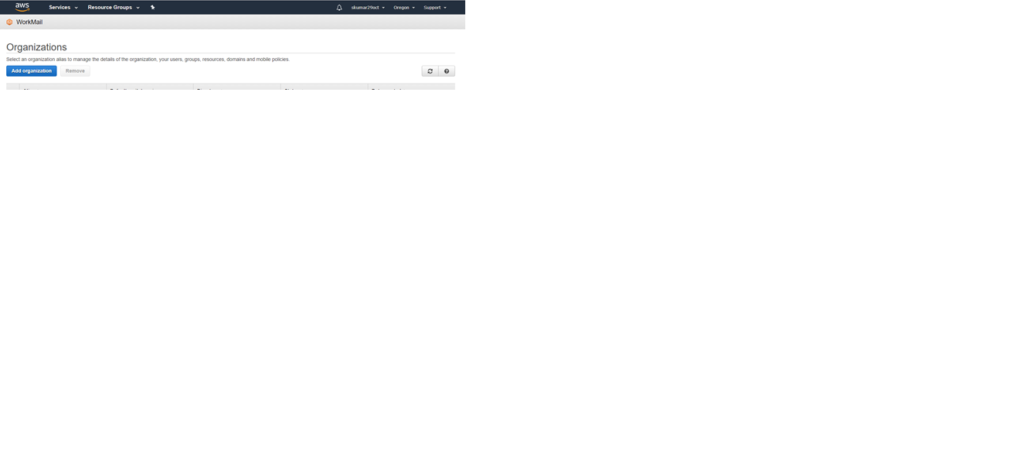
2. Click on add organization.
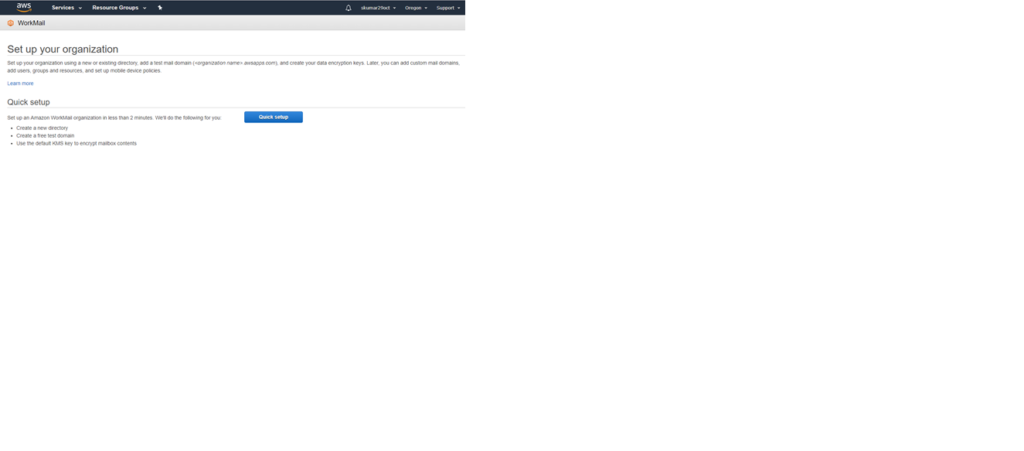
3. Click on Quick setup on next page.
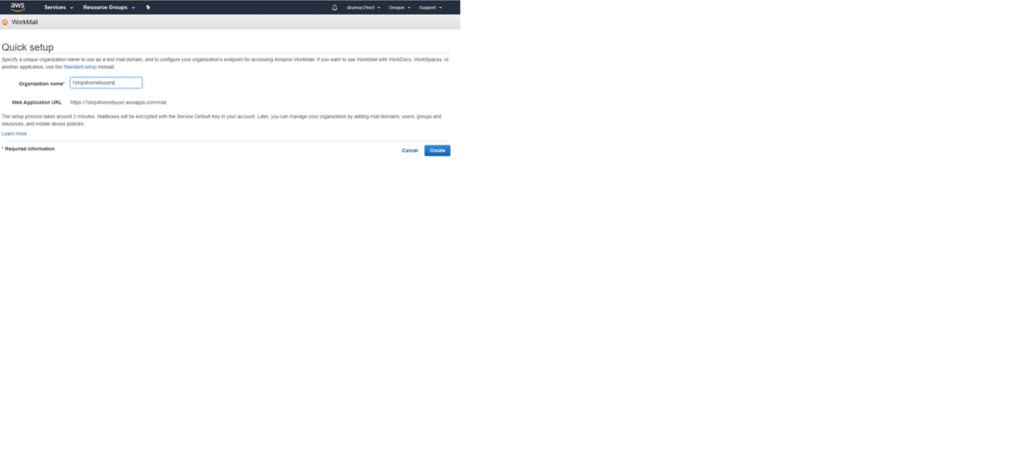
4. Give the domain name in organization.
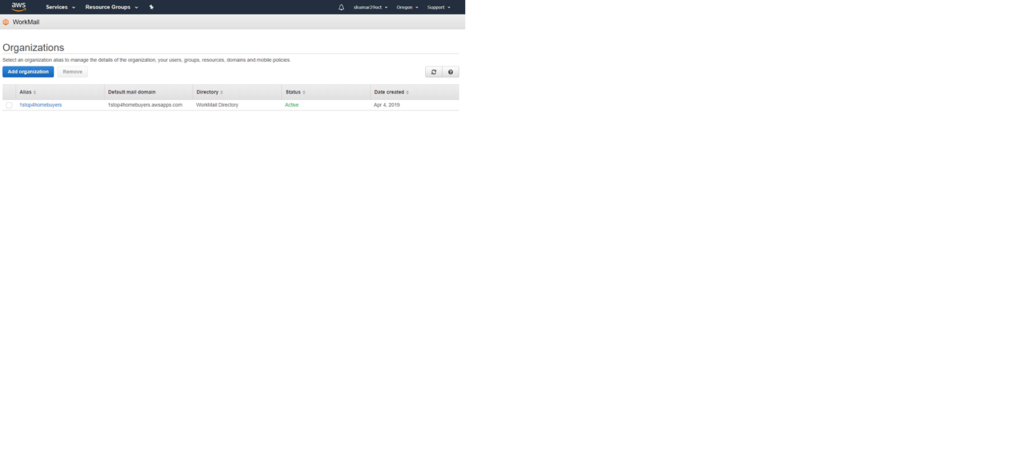
5. You can see it as below after the organization is created. It can take few min to be active.
Here click on name under “Alias”
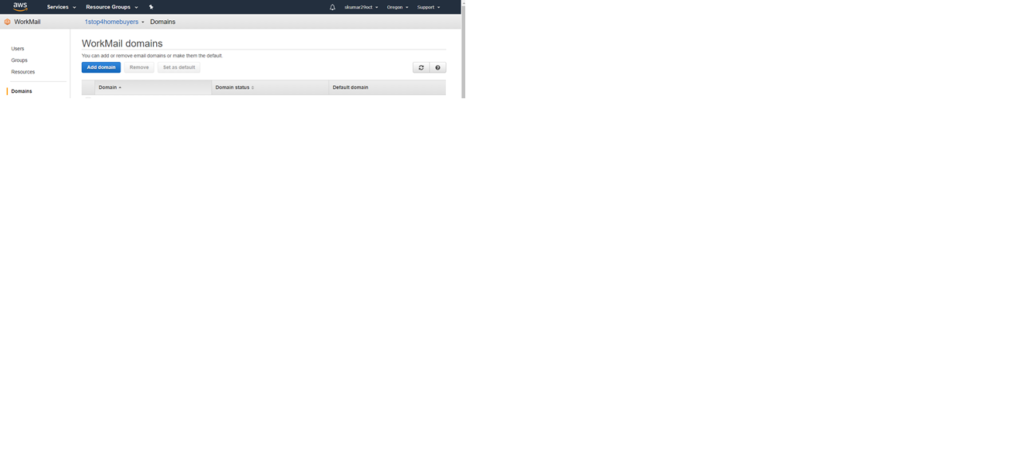
6. Click on Domain in Left side pane as below.
7. Click on Add domain.
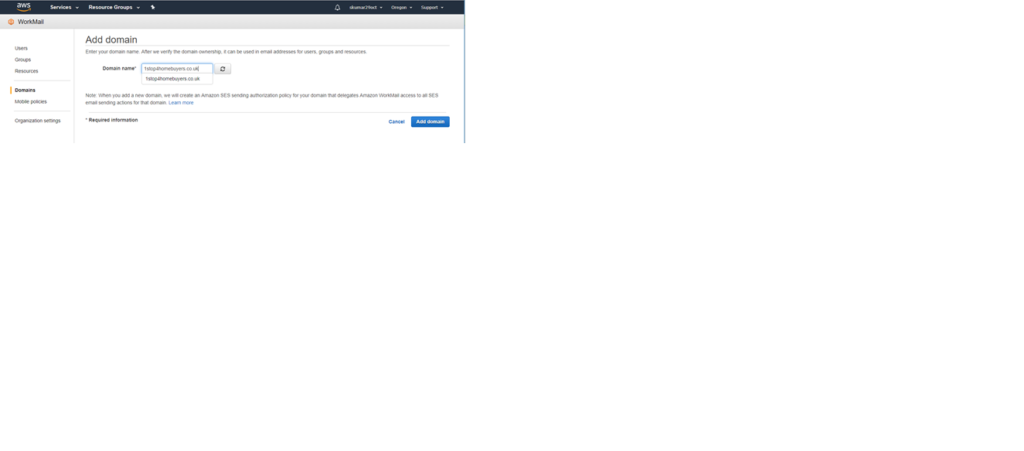
8. Give your registered domain name and click add domain.
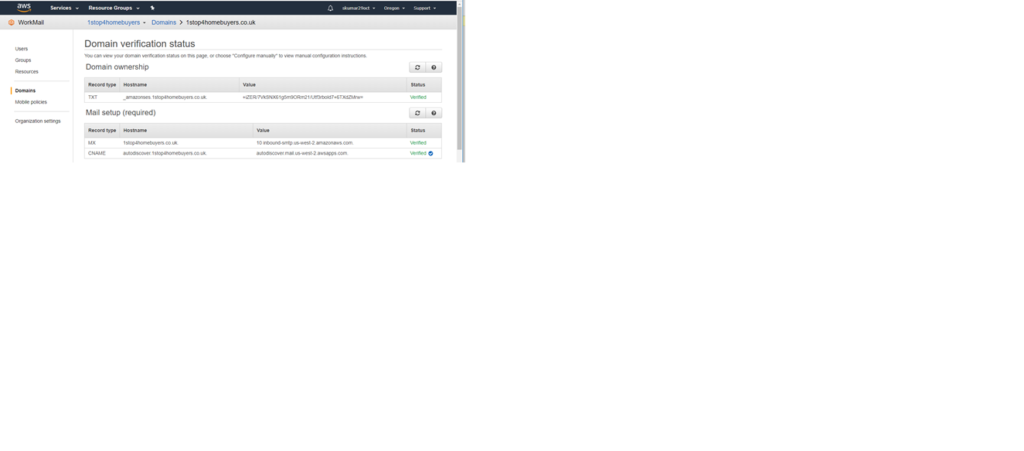
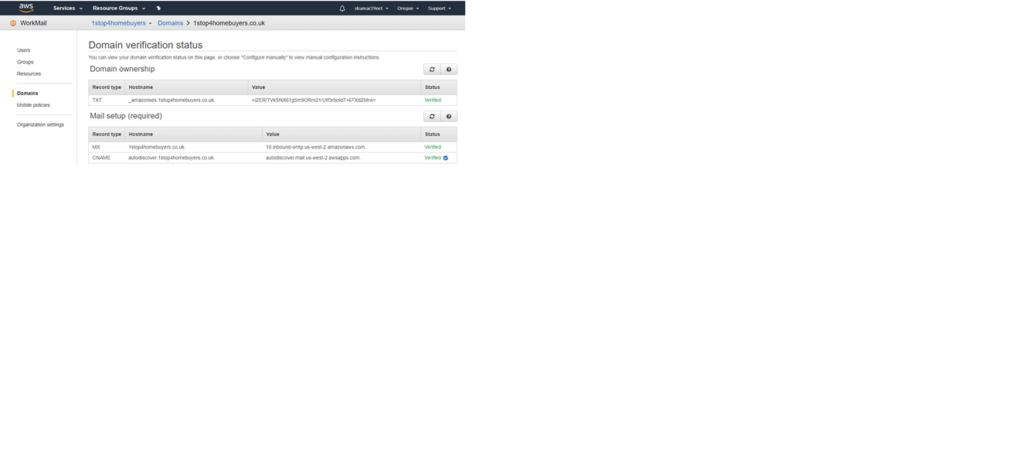
9.You can see the next screen as below, click on the domain name you have added. To verify the domain name, follow next 3 steps. It can take few min in the verification of the domain name after completion of the next 3 steps.

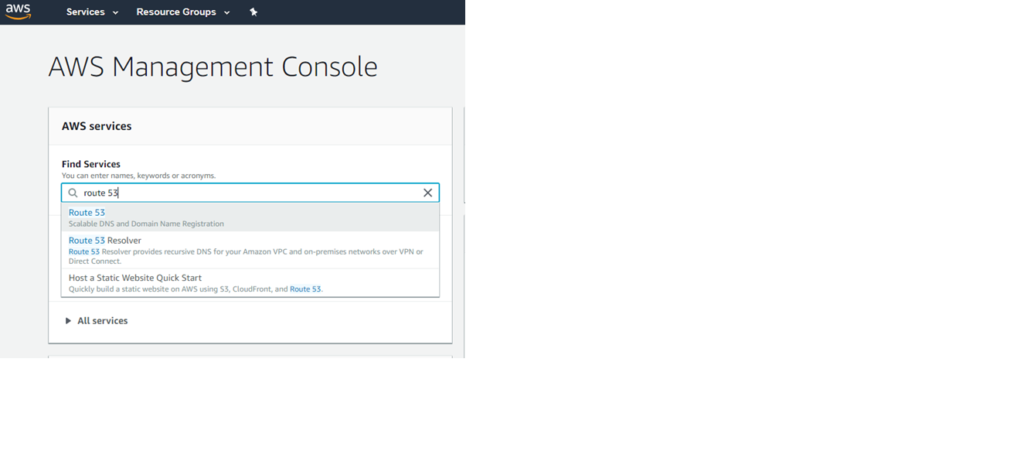
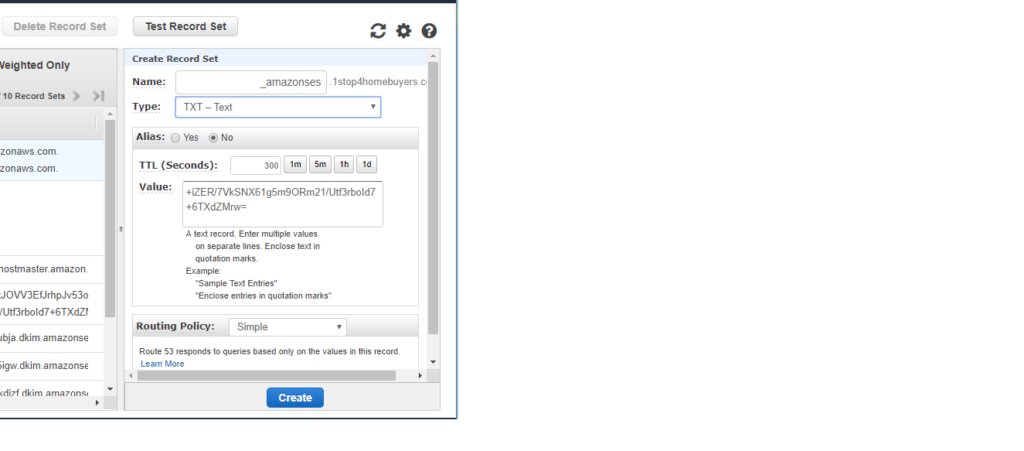
10. To Verify the domain name, From below screen under Domain ownership, copy the Record Type, Hostname without the domain name we added and the value. and use them in screen of Route 53 in step 14.
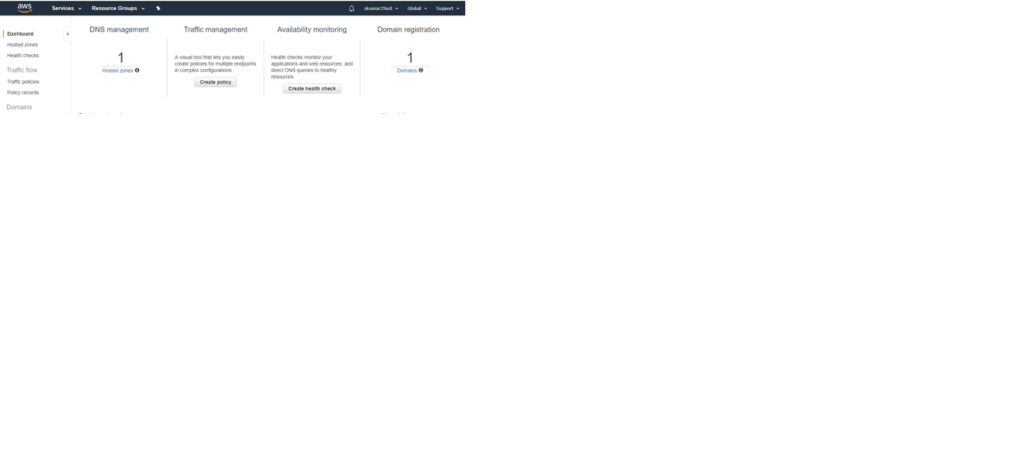
11. Open Route 53 service.
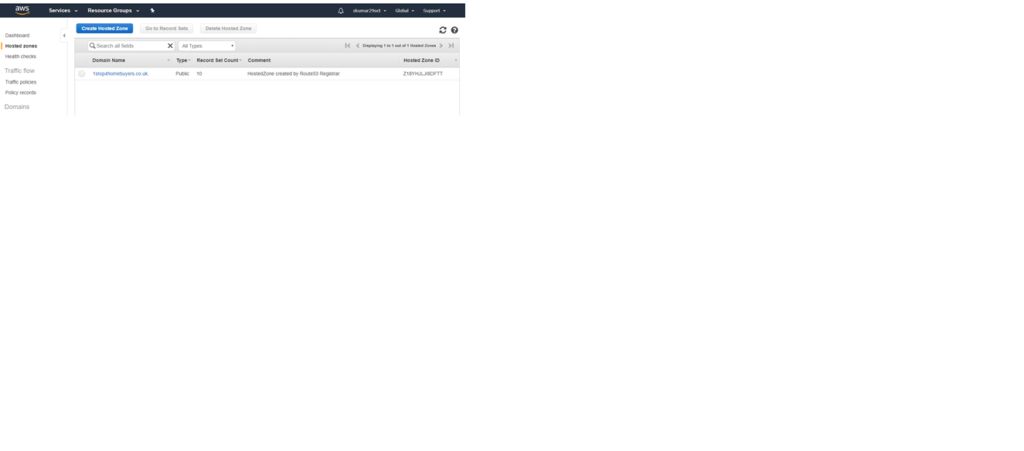
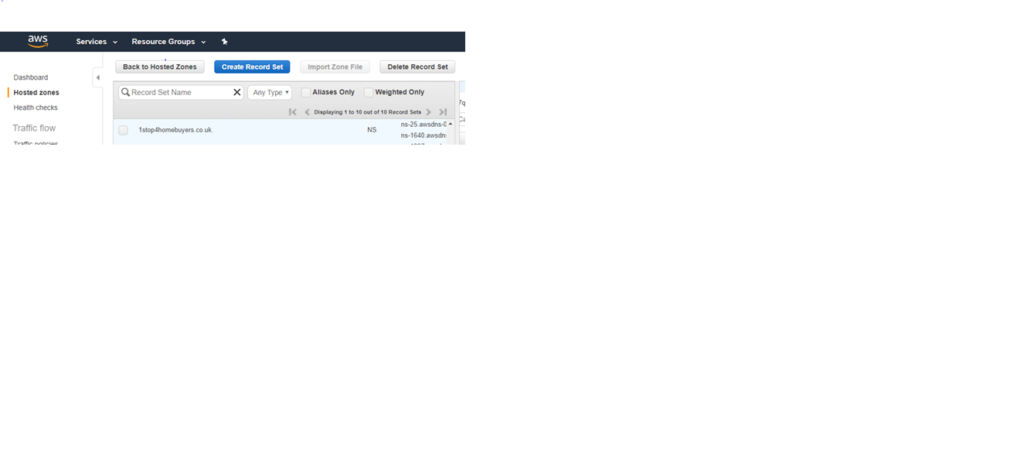
12. Click on Hosted Zones under DNS Management.
13. Click on domain name.
14. Click on Create record set and give values copied in step 10 to the next screen. Then click on Create button.
15. After the Domain name is verified or during the process we can add the records under mail set up on screen in step 10, same as step 14.

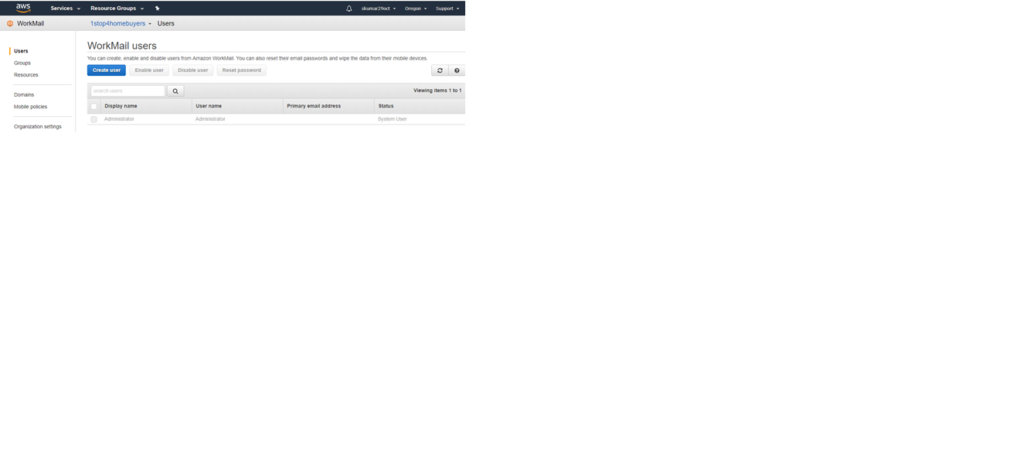
16. After all the record types in Work mail screen, go to user in work mail screen.
17. Click on Create User.
18. Give the required details as below and click on Next.

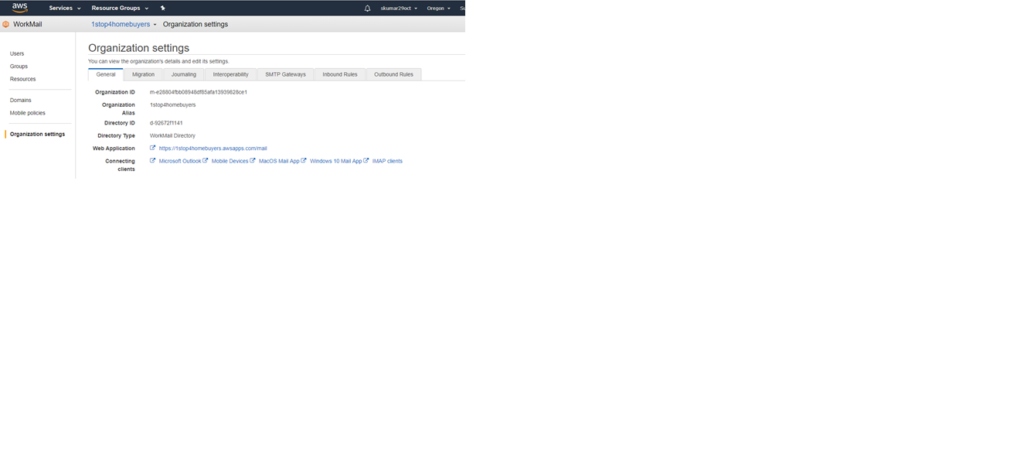
19. Give Password on next screen and click add user.

20. Next screen will be like this. Go to Organization settings.

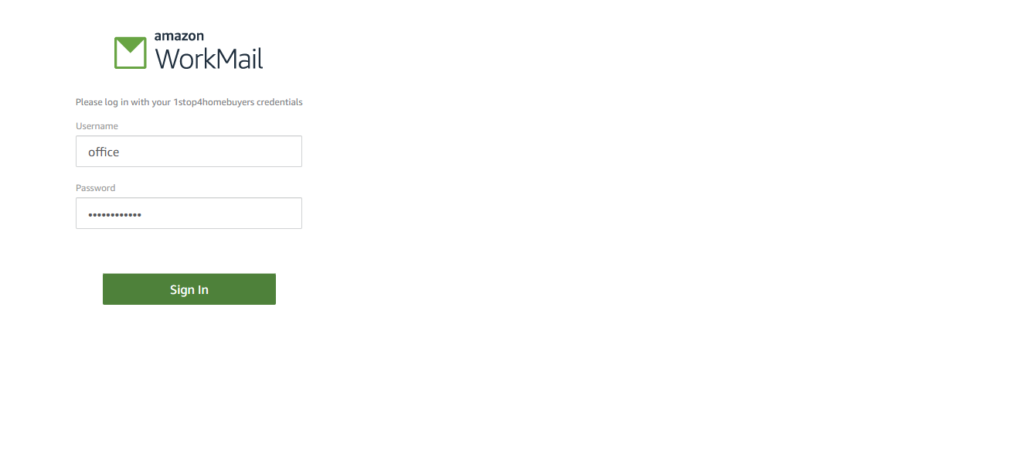
21. Click on Link ahead of web application.
22. Give Username and Password on next screen as below and click sign in.
23. Now you can send or receive the messages using this email address created.

Thank you for the reading. Please ask your questions in comment section.